Identifying Ceiling Water Damage: A Comprehensive Guide
Ceiling water damage is a common issue that many homeowners face, and if left unchecked, it can lead to costly repairs and serious structural problems. Identifying ceiling water damage early is crucial to prevent further deterioration and to address the root cause effectively. This guide will help you understand the signs, causes, and solutions for ceiling water damage, ensuring that you can protect your home and maintain its integrity.
What Causes Ceiling Water Damage?
Understanding the common causes of ceiling water damage is the first step in prevention and timely repair. Here are the primary culprits:
1. Roof Leaks
Roof leaks are one of the most common causes of ceiling water damage. Damaged shingles, cracked flashing, or clogged gutters can allow water to seep into your home, leading to stains, discoloration, and eventually structural damage if not addressed.
2. Plumbing Issues
Leaking pipes or faulty plumbing fixtures above the ceiling can cause significant water damage. Whether it’s a slow drip or a sudden burst, water can pool on the ceiling, leading to unsightly stains, mold growth, and weakened structures.
3. Condensation
In areas with high humidity, condensation can build up on the ceiling, especially if there is poor ventilation. Over time, this moisture can lead to water stains, mold, and even ceiling collapse in severe cases.
4. HVAC System Leaks
Leaks from air conditioning units or other HVAC systems located in the attic or ceiling space can also cause water damage. Improper insulation or blocked drainage lines are often the culprits.
For expert assistance in identifying and repairing ceiling water damage, contact Helpers Restoration.
Signs of Ceiling Water Damage
Spotting the early signs of ceiling water damage can save you from extensive repairs down the line. Here’s what to look out for:
1. Water Stains and Discoloration
One of the most obvious signs of ceiling water damage is water stains or discoloration. These spots are usually yellowish-brown and can vary in size. They often appear after heavy rain or when there is a plumbing issue.
2. Peeling or Bubbling Paint
If the paint on your ceiling is peeling or bubbling, it’s a clear indication that moisture is trapped underneath. This is a common symptom of prolonged water exposure and needs to be addressed quickly to prevent further damage.
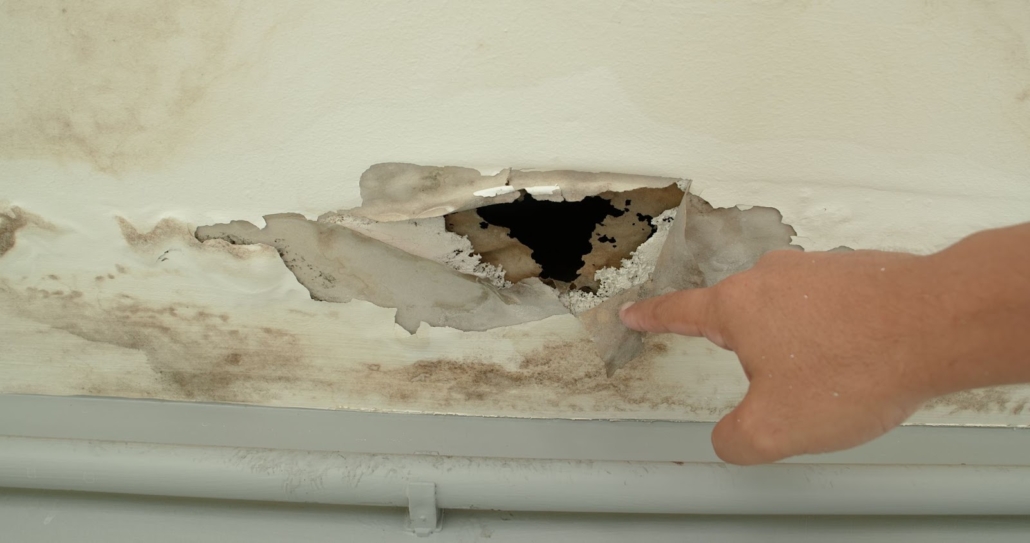
3. Sagging Ceiling
A sagging ceiling is a serious sign of water damage. This occurs when water accumulates above the ceiling, weakening the structure. If you notice any sagging, it’s crucial to take immediate action as it could lead to a ceiling collapse.
4. Mold Growth
Mold is a common consequence of water damage and can start growing within 24-48 hours of water exposure. Mold on the ceiling usually appears as dark spots and can be accompanied by a musty odor. Mold not only damages your home but also poses health risks.
5. Damp or Musty Odor
A persistent damp or musty smell is often a sign of hidden water damage. Even if you don’t see visible water stains or mold, the smell can indicate that moisture is trapped somewhere in the ceiling.
How to Confirm Ceiling Water Damage
If you suspect ceiling water damage, it’s essential to confirm it before taking any further steps. Here’s how you can do that:
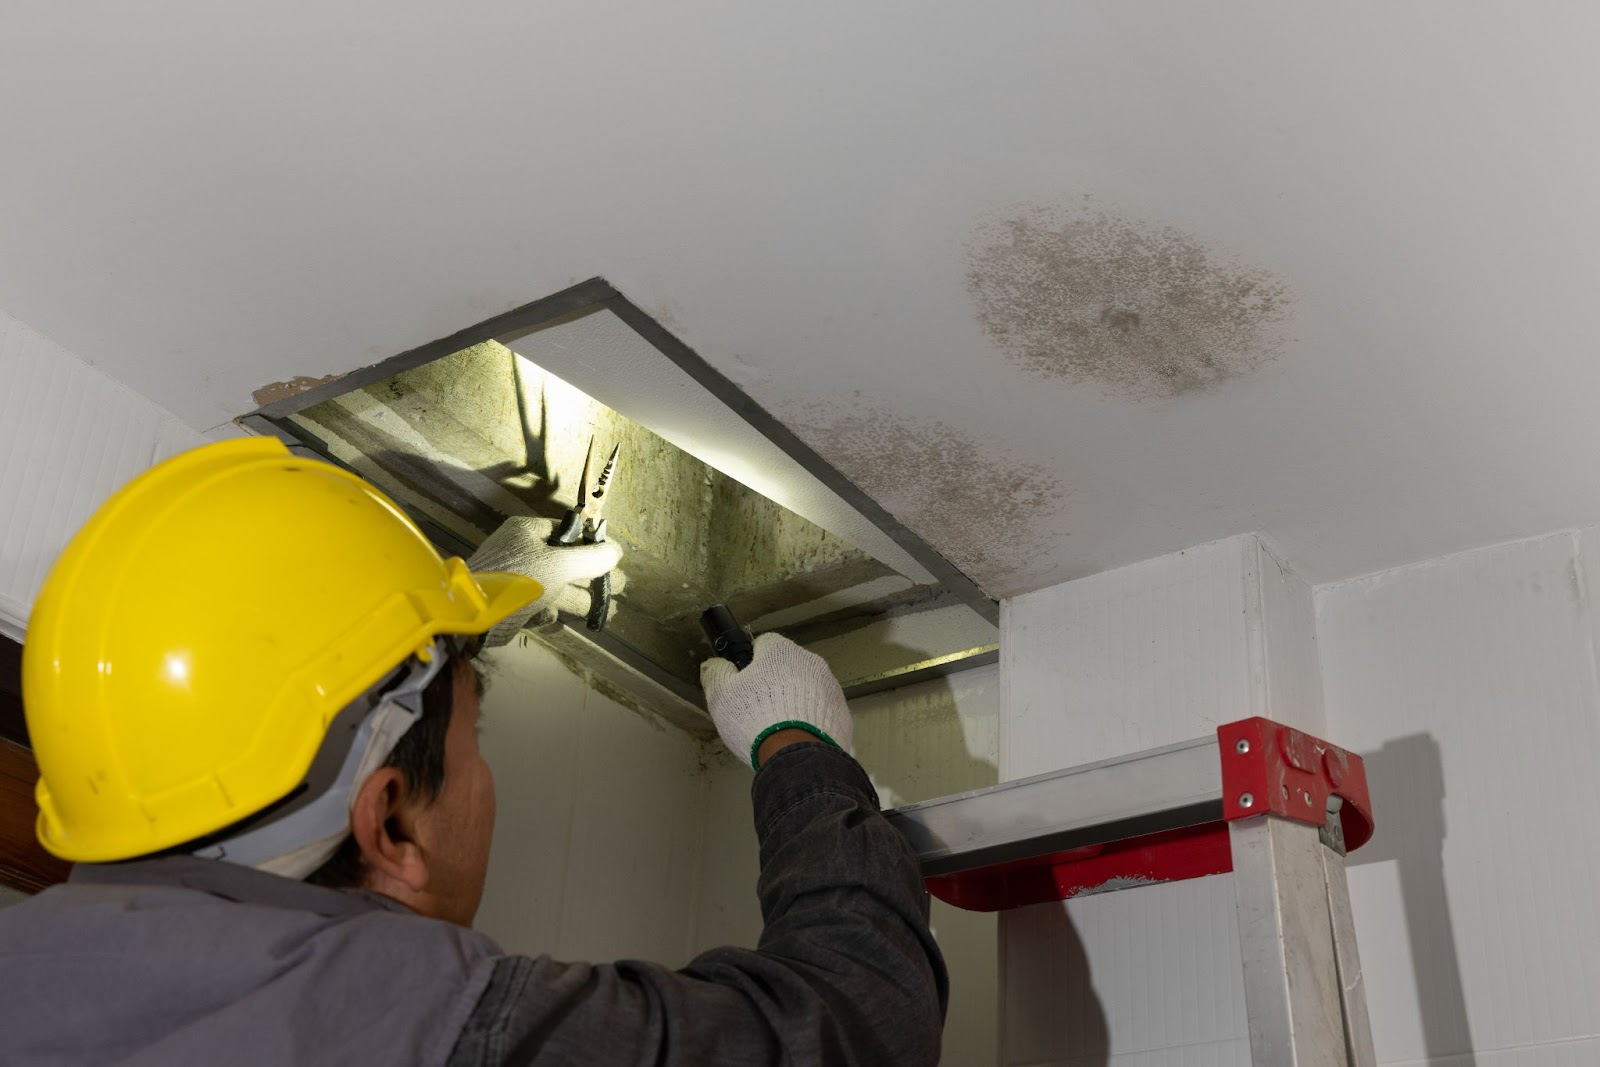
1. Check the Source
If you notice water stains or other signs, try to identify the source of the water. This could be a roof leak, plumbing issue, or HVAC problem. Inspect the area above the damaged ceiling to see if you can find the origin of the water.
2. Use a Moisture Meter
A moisture meter is a handy tool that can detect the presence of moisture in your ceiling. It’s particularly useful for identifying hidden water damage that isn’t visible to the naked eye.
3. Consult a Professional
If you’re unsure about the extent of the damage or the source, it’s always best to consult a professional. Water damage restoration experts have the tools and experience to diagnose the issue accurately and recommend the best course of action.
For professional water damage restoration services, visit Helpers Restoration.
Steps to Repair Ceiling Water Damage
Once you’ve identified the damage and its source, it’s time to move on to repairs. Here’s a step-by-step guide to fixing ceiling water damage:
1. Stop the Water Source
Before making any repairs, ensure that the water source is fixed. This might involve repairing a roof leak, fixing a plumbing issue, or addressing HVAC leaks. Stopping the water flow is crucial to prevent further damage.
2. Dry the Affected Area
Drying the damaged area is essential to prevent mold growth. Use fans, dehumidifiers, or even professional-grade drying equipment to remove moisture from the ceiling. This process may take a few days, depending on the extent of the damage.
3. Remove Damaged Materials
If the ceiling material is severely damaged, it may need to be removed and replaced. Cut out the affected area, being careful to avoid any electrical wires or other utilities. Dispose of the damaged materials safely.
4. Repair and Patch the Ceiling
Once the area is dry and clean, you can begin repairs. Use drywall or plaster to patch the ceiling, ensuring it matches the surrounding area. If you’re dealing with a large area of damage, you might need to replace an entire section of the ceiling.
5. Prime and Paint
After the patch has dried, apply a primer to the repaired area. This will help seal the surface and prevent future stains. Once the primer is dry, paint the ceiling to match the rest of the room. This will restore the ceiling’s appearance and make it look as good as new.
Preventing Future Ceiling Water Damage
Prevention is always better than cure. Here are some tips to help you avoid ceiling water damage in the future:
- Regular Roof Inspections: Have your roof inspected regularly, especially after severe weather. Repair any damaged shingles or flashing promptly to prevent leaks.
- Maintain Plumbing Systems: Check your plumbing systems regularly for leaks and corrosion. Fix any issues immediately to prevent water from seeping into the ceiling.
- Proper Ventilation: Ensure that your home is well-ventilated, particularly in high-humidity areas like bathrooms and kitchens. This will reduce the risk of condensation and moisture buildup.
- Monitor HVAC Systems: Regularly inspect and maintain your HVAC systems, ensuring that drainage lines are clear and insulation is intact. This will prevent leaks and water damage from your air conditioning unit.
Conclusion
Identifying and addressing ceiling water damage promptly can save you from costly repairs and long-term issues. By understanding the signs, causes, and repair methods, you can protect your home and maintain its value. Remember, if you’re unsure about the extent of the damage or how to fix it, consulting a professional restoration service is always the best course of action.
For expert ceiling water damage identification and repair, contact Helpers Restoration.


